Quadrajet Primary Shaft Bushings

Disclaimer: Links on this page pointing to Amazon, eBay and other sites may include affiliate code. If you click them and make a purchase, we may earn a small commission.

Bextreme04

Full Access Member
Joined
May 13, 2019
Posts
4,464
Reaction score
5,632
Location
Oregon
First Name
Eric
Truck Year
1980
Truck Model
K25
Engine Size
350-4bbl
So here is one mod I like and I got the idea from a rebuild kit I had seen.
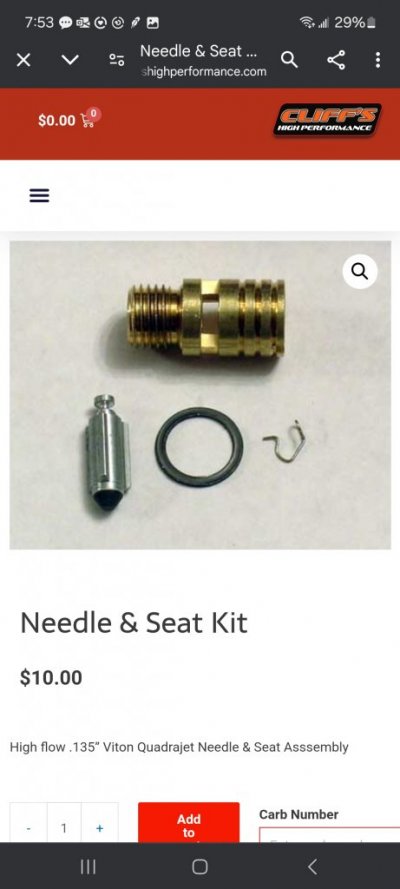
The float seat had been slotted to assist in fuel flow.
So I cross drill mine, unless the rebuild kit comes with a modified seat.
The windowed seat does allow more flow, which is good for performance builds, but the downside is it can allow the bowl to drain back more and therefore is not recommended for stockish street builds. If everything is tight and working right, it isn't really a concern, but if you have the windowed seat you should really have the rubber one-way valve in the carb filter as well.
 

hey mister

Full Access Member
Joined
Jun 15, 2024
Posts
271
Reaction score
650
Location
North Coast
First Name
Marty
Truck Year
1978
Truck Model
C10
Engine Size
350
.007 clearance? OK so what happened ? Why was there so much clearance with the new bushings and shaft? Was the shaft worn junk? How did you fix that? New shaft available :think:

Every seen that video of, Jeff Bradshaw of Elderly Iron, rapping and tying thread around a Carburetor shaft to fix loose shaft vacuum leak?:eek::eek:
So, I'm not a fan of boobtube.
In a number of "how too" videos, I've seen them intentionally give information that was sure to sabatoge the outcome.

There is biased motivations to maintain subscription numbers and many (not all) tubers are willing to say or do anything to sustain those numbers.

There is no accountability to giving out bad info.
If a project gets scrapped, there is no recourse.
Worse yet, if someone gets hurt, who can you blame?

Again, not all are like this, but they are out there.

The other issue is the people looking to get free info and fix "whatever" on the cheap.

This is why, you will rarely, if ever mention any boobtube.

The best policy is to grab a book of a well renouned author and do your homework.
 

hey mister

Full Access Member
Joined
Jun 15, 2024
Posts
271
Reaction score
650
Location
North Coast
First Name
Marty
Truck Year
1978
Truck Model
C10
Engine Size
350
The windowed seat does allow more flow, which is good for performance builds, but the downside is it can allow the bowl to drain back more and therefore is not recommended for stockish street builds. If everything is tight and working right, it isn't really a concern, but if you have the windowed seat you should really have the rubber one-way valve in the carb filter as well.
Interesting..
How can fuel "drain" back?
Fuel would have to flow against the fuel pump.
 

YakkoWarner

Full Access Member
Joined
May 29, 2024
Posts
203
Reaction score
283
Location
Central Texas
First Name
Wolf
Truck Year
1989
Truck Model
R2500 Suburban
Engine Size
454
From what I can tell from pictures, there seem to be enuf meat to install bushings on the SU's.
The real issue would be, are there bushings availavle from a bearing waerhouse.
I did see a SzU carb on fleabay for $45.

Moss Motors sells a kit with the bushings and a reamer, so I know they parts are available - just their kit is pricey and I'm not sure I could pull it off successfully without actual machining tools. If I can find spares, you may be getting a call (I have no doubt you have the skill and tooling to get it right the 1st time, but I don't want to send off my ONLY pair of SU's or my only throttle body and have them get lost in shipping somewhere, plus I can't really have my Suburban down for however long it takes UPS to get it back and forth).
 

JD Miller

Full Access Member
Joined
Sep 30, 2024
Posts
437
Reaction score
810
Location
Goober Idaho
First Name
JD
Truck Year
1981
Truck Model
K20 silverado
Engine Size
350
Yes, the .007 was prior to installing the new bushings.
OOPS! :idiot:I read it wrong


Take it easy..... Ol' Jeff Bradshaw of Elderly Iron (Redneck Restoration) isnt a "how to" videos. Its was just fun Entertainment Redneck Style, far as Im concerned.

This thread is nothing more than a internet "how to" thread instead of one of those boobtube vids you mention
 
Last edited:

Bextreme04

Full Access Member
Joined
May 13, 2019
Posts
4,464
Reaction score
5,632
Location
Oregon
First Name
Eric
Truck Year
1980
Truck Model
K25
Engine Size
350-4bbl
Interesting..
How can fuel "drain" back?
Fuel would have to flow against the fuel pump.
Gravity...

If there is any little bit of a leak on the check valve in the pump, it will siphon the fuel right down to the air break point in the fuel bowl. So if you have the full height solid seat, that amount is the full seat height. If you have windowed it, now that amount is all the way to the bottom of those windows. You never notice the amount in the fuel lines being siphoned down because by the time the engine has run long enough to use up all the fuel in the bowl, it has pumped the fuel lines back full and started filling the fuel bowl back up. If you find yourself having to crank the engine for an extended period before it starts after sitting for any amount of time, this is likely what is happening.
 

hey mister

Full Access Member
Joined
Jun 15, 2024
Posts
271
Reaction score
650
Location
North Coast
First Name
Marty
Truck Year
1978
Truck Model
C10
Engine Size
350
OOPS! :idiot:I read it wrong


Take it easy..... Ol' Jeff Bradshaw of Elderly Iron (Redneck Restoration) isnt a "how to" videos. Its was just fun Entertainment Redneck Style, far as Im concerned.

This thread is nothing more than a internet "how to" thread instead of one of those boobtube vids you mention
Well, crack a brew and enjoy the entertainment.

I hope this thread serves as an inspiration for others putting up with that carb that stumbles on idle and hates to start.
 

hey mister

Full Access Member
Joined
Jun 15, 2024
Posts
271
Reaction score
650
Location
North Coast
First Name
Marty
Truck Year
1978
Truck Model
C10
Engine Size
350
I gave a bit more thought to the comment that this is nothing more than a boobtube video.
Obviously I disagree..
If this was nothing more than a tuber video, I would know the number of people who have watched it.
I would be asking for subscribers and know those numbers too.
I would making money off of clicks to links.
None of which is true.
And if I was looking for that kind of attention, I would be a tuber.
That's why I am not.

I believe we all have different talents and our greatest satisfaction is realized when we share those talents.
I realize my mechanical talent and my desire to teach.
Some folks realize this. Some do not.
 

hey mister

Full Access Member
Joined
Jun 15, 2024
Posts
271
Reaction score
650
Location
North Coast
First Name
Marty
Truck Year
1978
Truck Model
C10
Engine Size
350
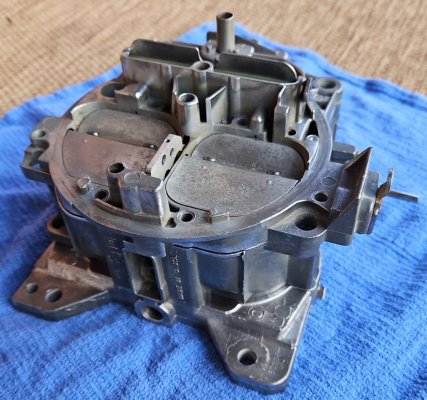
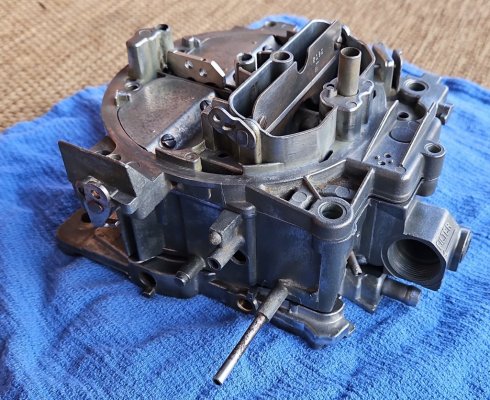
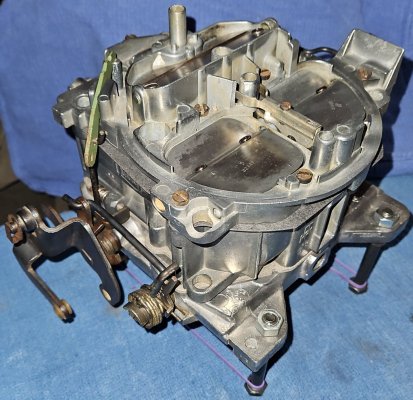
So while I wait for the carb rebuild kit to arrive, time at the soft wire wheel removes the crust and brightens things up. If it was much warmer out, rustolum silver paint would be shot on all steel parts. But since it's only 25° outside, I'll have to do something else.
I have thought about bluing the steel parts, which would look kewl, but eh, idunno...
We'll see...
 

Attachments

  • IMG_20241212_115514_785.jpg
    IMG_20241212_115514_785.jpg
    189 KB · Views: 15
  • IMG_20241212_115500_482.jpg
    IMG_20241212_115500_482.jpg
    239.9 KB · Views: 16

hey mister

Full Access Member
Joined
Jun 15, 2024
Posts
271
Reaction score
650
Location
North Coast
First Name
Marty
Truck Year
1978
Truck Model
C10
Engine Size
350
Cliff's rebuild kit came Friday, but I was a tad busy this weekend to get after it.
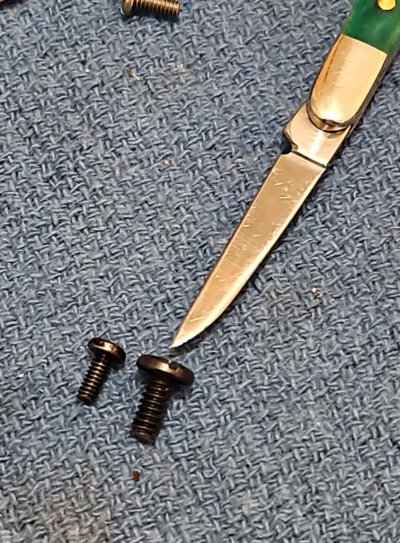
Cliff's kit included a spring, screws and cam for the secondary upper butterfly.
It only took about 15 minutes to get the upper butterfly out and cleaned up.
Cliff will also include a 6-32 screw upgrade for the lower secondary if you wish to drill and tap the shaft for it.
That upgrade only took about 10 minutes to accomplish. Eezee, pezee.
 

Attachments

  • IMG_20241216_135833_335.jpg
    IMG_20241216_135833_335.jpg
    100.9 KB · Views: 12
  • IMG_20241216_150448_881.jpg
    IMG_20241216_150448_881.jpg
    127.4 KB · Views: 11
  • IMG_20241216_150458_373.jpg
    IMG_20241216_150458_373.jpg
    116.2 KB · Views: 13
  • IMG_20241216_142401_332.jpg
    IMG_20241216_142401_332.jpg
    215.3 KB · Views: 14

hey mister

Full Access Member
Joined
Jun 15, 2024
Posts
271
Reaction score
650
Location
North Coast
First Name
Marty
Truck Year
1978
Truck Model
C10
Engine Size
350
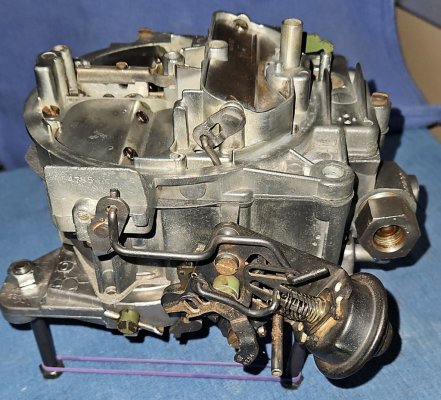
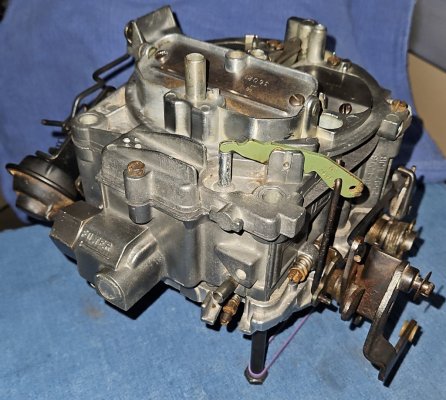
Buttoned up and ready to tune.
 

Attachments

  • IMG_20241216_175318_135.jpg
    IMG_20241216_175318_135.jpg
    232 KB · Views: 15
  • IMG_20241216_175349_696.jpg
    IMG_20241216_175349_696.jpg
    200.5 KB · Views: 15
  • IMG_20241216_175413_474.jpg
    IMG_20241216_175413_474.jpg
    227 KB · Views: 16

Ricko1966

Full Access Member
Joined
Apr 11, 2017
Posts
5,703
Reaction score
9,396
Location
kansas
First Name
Rick
Truck Year
1975
Truck Model
c20
Engine Size
350
Gravity...

If there is any little bit of a leak on the check valve in the pump, it will siphon the fuel right down to the air break point in the fuel bowl. So if you have the full height solid seat, that amount is the full seat height. If you have windowed it, now that amount is all the way to the bottom of those windows. You never notice the amount in the fuel lines being siphoned down because by the time the engine has run long enough to use up all the fuel in the bowl, it has pumped the fuel lines back full and started filling the fuel bowl back up. If you find yourself having to crank the engine for an extended period before it starts after sitting for any amount of time, this is likely what is happening.
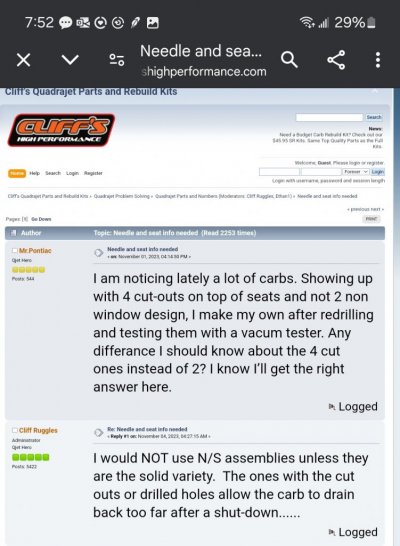
This^^^ and also if just a little fuel evaporates the float moves,the needle opens and the fuel drains all the way to the window. If you have a return style fuel pump the fuel drains through the return line unchecked,unless you have a working factory fuel filter with a check valve. According to Roe and Ruggles there is no performance advantage to a windowed needle and seat,and Rughles specifically says not to run them.As I recall you can redrill the orifice diameter of the seat for more flow. P.S. nice work on the carb rebuild

Well lookie here, I'm getting mixed signals,my vote is still no on windowed needles and seats. But look at these screen shots.
 

Attachments

  • Screenshot_2024-12-16_195249.jpg
    Screenshot_2024-12-16_195249.jpg
    126.1 KB · Views: 20
  • Screenshot_2024-12-16_195342.jpg
    Screenshot_2024-12-16_195342.jpg
    51.8 KB · Views: 19
Last edited:

75BEASTK20

Full Access Member
Joined
Nov 5, 2024
Posts
89
Reaction score
122
Location
B.C. CANADA
First Name
Cal
Truck Year
1975
Truck Model
K20
Engine Size
427
Good day group.
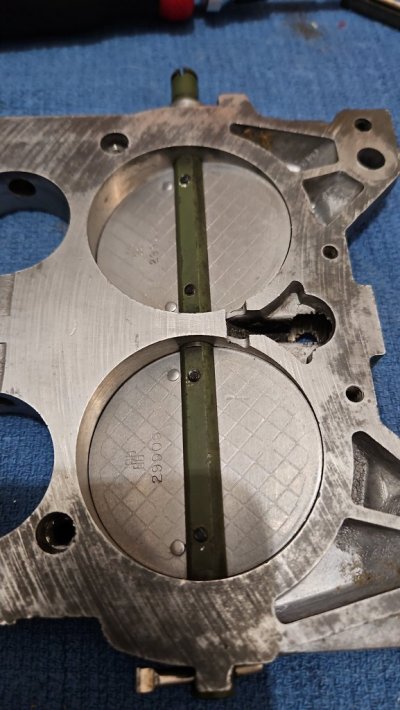
This thread is in reference to having bushings installed in the throttle plate of a Quadrajet; specifically the primary butterfly shaft bore.

But before I get too far into this, I need to make a couple of things very clear.
#1- Read this entire post completely...twice...then read it again.
Sorry, I will apologize now. As I get older, tolerance for stupid questions fades.
Nuf said...Let's move on.
#2- You will have to trust me when I say, I can rebush the throttle plate.
I have done 5 of them so far and 3 were not mine.
#3- Yes. You can buy a kit and do it yourself on a drill press.
If you have bought that kit and attempted to do that (and boogered up the job) do not ask me to fix it.
I must have the three bores the shaft rides in, to "set up" on. If you have cut into the bores, the chances of saving it are about zero...Sorry.

Here's the important stuff...
The primary shaft bores get the most wear. If the secondaries have a little play in them, it's no big deal. They are an "air gate" anyway and their operation is relatively infrequent. So a little shaft play is not an issue.
That's why, only the primary gets attention.
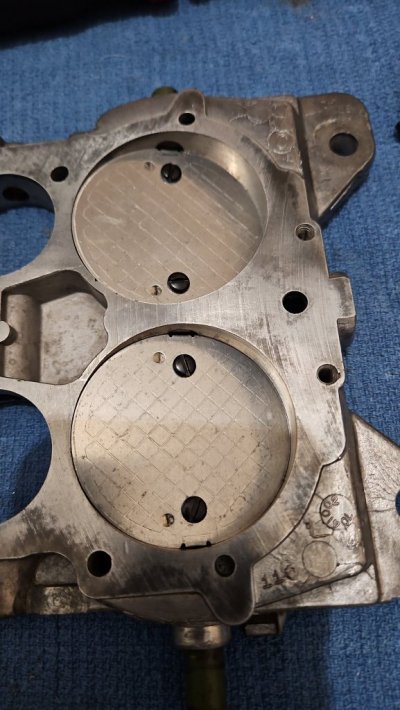
So, the primary shaft is steel and the plate is a die cast aluminum alloy, which is way softer than steel. That means the plate will wear more than the shaft. Hense the reason why the TB plate (throttle body) gets bushings installed.
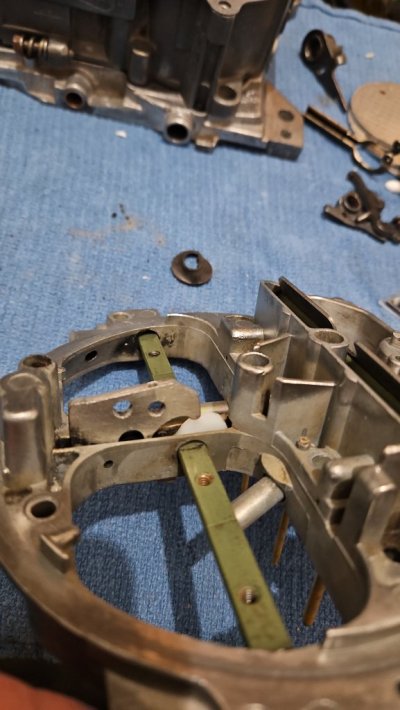
So, what you must be very careful with is the green-ish coating on the shafts themselves. Do not, I repeat, do not remove, sand, scotchbrite, wire-wheel any of it. That green coating is like a Teflon coating. It is an anti-friction coating. Don't monkey with it. Also if the shaft is bent or twisted, it's probably no good. Find a replacement.

All that said, if you have good, un-molested parts, I can install 2 bushings in a couple hours, Lord willing. ***To inquire about this service, please see this thread:
And it will only cost you $50. + shipping both ways....keep reading...

Here's what you must do before you toss a carb at me.
1) You have to take the carb apart and clean it up, as if you're eating dinner off it.
I suggest getting a bucket of carb cleaner with the parts basket in it. (Yea, it ain't cheap) But this is the heart of your engine and we're about to perform surgery, so get it clean.
I also suggest getting a book or two on rebuilding and tuning QJ's...and read them...all the way through..twice.
Like prevously mentioned, you will have to take your carb apart, completely.
That means the butterflies have to come off the shaft...All 4 of them.
I can hear it now.."But why the secondaries?"
Because there will be tiny aluminum chips everywhere and just 1 tiny chip in between any shaft and bore is instant death with 1 turn of the shaft. Remember (Clean is key)
You will have to completely dismantle the carb. And you will have to learn the technique for removing the tiny screws that hold the butterflies on the shaft, without damaging the butterflies, shaft or plate bores. That is critical.
Notice I didn't mention the screws. That's because the screws are only used once. They must be replaced with new screws that will not interfere with carb operation.
And if you bust off screws in the shaft, you will score up the shaft bores if you don't get all the screw out before attempting to remove the shaft. And you will probably twist the shaft and scrap the TB plate.

Well, now that you have read through this, hopefully twice and you have the desire to learn about rebuilding the QJ, get a couple of the books and read them twice. Save your questions till after you read the books.
Then reach out and we will talk.
Then after that, pull the carb, clean and dismantle.
Then we will talk again and determine if it's worth rebuilding and go from there.
That is the logical order.
You could search for a QJ ready for a rebuild. Read the books and dismantle that one. Just make sure you understand the QJ numbers and get a doner that will work.
Don't ask me about QJ numbers or if something will work for your application.
That's what the books, and your understanding of them is for.

I'm just putting bushings in the bores, in a highly precision manner.

In no particular order here's the books I have read and suggest. And availability may be scarce and only as a used book. Or you may be able to locate it as a .pdf in the Library of Congress.

- How to Rebuild and Modify Rochester Quadrajet Carburetors by Cliff Ruggles
ISBN: 978-1-932494-18-1

Rochester Carburators by Doug Roe
ISBN: 0-89586-301-4

The Quadrajet MPG Secret, Second Edition by Kevin R. Hill
ISBN: 9-781075307713

Haynes Techbook
Rochester Carburator Manual
ISBN: 1-56392-068-9

Let the fun commence!
Not your first rodeo I see. Bang on.
 

75BEASTK20

Full Access Member
Joined
Nov 5, 2024
Posts
89
Reaction score
122
Location
B.C. CANADA
First Name
Cal
Truck Year
1975
Truck Model
K20
Engine Size
427
Years ago when I was playing with motorcycle carbs, I found a small parts washer. I have a couple gallons of Berryman carb cleaner in it.
Cleaning the 3 main body parts took most of the day.
I would let the part soak a couple hours and then hit it with a small brush, then repeat until clean.
I like Berryman because you can use paper towel to dry it off, mostly and then Dawn dish detergent and hot water cleans it right up.
Sea foam soak works not too bad too. Similar to Berryman
 

Forum statistics

Threads
44,554
Posts
960,780
Members
37,031
Latest member
mckenziek
Top