You are using an out of date browser. It may not display this or other websites correctly.
You should upgrade or use an alternative browser.
You should upgrade or use an alternative browser.
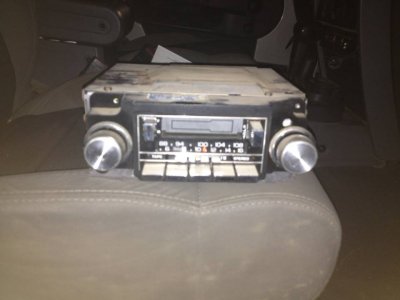
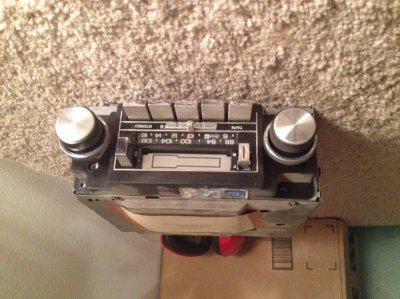
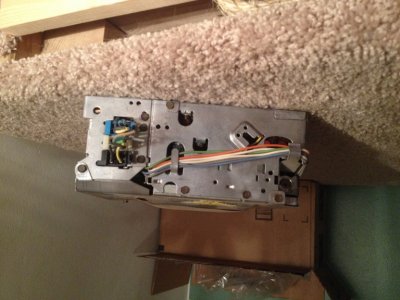
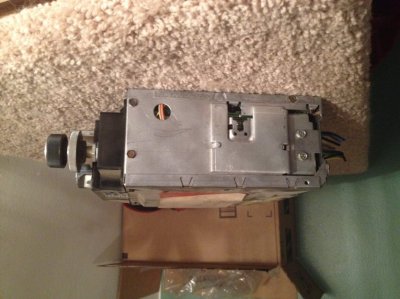
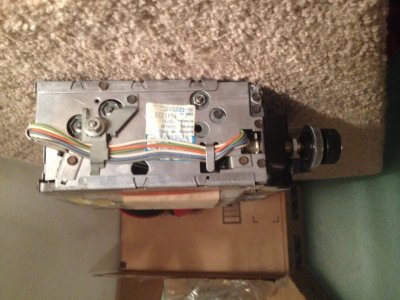
Found this yesterday
- Thread starter cjkirby55
- Start date
Disclaimer: Links on this page pointing to Amazon, eBay and other sites may include affiliate code. If you click them and make a purchase, we may earn a small commission.
- Joined
- Aug 19, 2010
- Posts
- 28,489
- Reaction score
- 9,550
- Location
- Kansas City, Mo
- First Name
- Jacob
- Truck Year
- 1977/1990/1991
- Truck Model
- C10 longbed/R1500 Burb/R3500 Dually
- Engine Size
- 350/350/454
That's cool. I've still got my original AM radio that came out of my '77. It still works 
- Joined
- Sep 29, 2010
- Posts
- 17,191
- Reaction score
- 2,518
- Location
- Green Bastard Parts Unknown
- First Name
- Jay
- Truck Year
- 2001
- Truck Model
- pontiac aztek
- Engine Size
- 3.4
Hard one to find, nice!
highdesertrange
Full Access Member
- Joined
- Dec 19, 2013
- Posts
- 1,066
- Reaction score
- 211
- Location
- kalifornia
- First Name
- mike
- Truck Year
- 1978
- Truck Model
- k30
- Engine Size
- 454
cool there was a guy rebuilding the old delco factory radio's wonder if he's still around. highdesertranger
cjkirby55
Full Access Member
- Joined
- Jan 22, 2012
- Posts
- 132
- Reaction score
- 18
- Location
- Indiana
- First Name
- Chris
- Truck Year
- 1985
- Truck Model
- C10
- Engine Size
- 355
I haven't had a chance to try it out yet, and I don't have anything to put it in since both my squares have been cut for modern radios. Maybe someday I'll find an original truck that needs it.
chengny
Full Access Member
- Joined
- Feb 22, 2012
- Posts
- 4,084
- Reaction score
- 1,024
- Location
- NH
- First Name
- Jerry
- Truck Year
- 1986
- Truck Model
- K3500
- Engine Size
- 350/5.7
I have seen one of my sons take an old stock Delco radio and modify it with an auxiliary jack. Then you just plug your Ipod (or whatever they are using these days) into the jack and start groovin' to the tunes.
I generally don't pay too much attention to half of what he does, but I got the gist of it by looking over his shoulder for a few minutes. The way he did it was wicked easy. Here is a more detailed procedure (compliments of SWIM)
http://67-72chevytrucks.com/vboard/showthread.php?t=447379&highlight=RADIO+mOD&page=2):
Hello all. This mod came about because I wanted to listen to my ipod in my truck, but I did not want to cut my dash.
I looked into the aftermarket shaft style but right now I can't justify the cost, so for about $20 I made my own.
The first thing I did was grab a stock radio from the local yard, and started to locate what wires were the tuner wires before the amp.
This part is real easy, there is a ORANGE wire and GREEN wire that go from the main board to the amp board
1
What you need to do now is cut the wires in the middle so you don't need to solder directly onto the board.
Now if you look at the location of the wires on the amp board it will tell you which one is left and right
2
Next you need to get a switchable female aux. input. I found one at radio shack, and it is real easy to locate because it will have 5 posts and has a clear side so you can see inside to id which is in and out for both the left and the right channels.
The reason you need a switchable input is because without something plugged in you have normal radio function, but as soon as you plug your ipod in it will disconnect the radio function and will send the new source into the amp
3
So now that you have cut the wires you need to solder 5 wires onto the aux. input. 1 ground that goes to the radio body , a right channel in and out, and a left channel in and out
4
Now you need to find out which is the left and right channels on the male portion that you plug in. If you look at the plug you will see 3 sections, the first at the tip is the left channel, the next one is the right channel, and the third is the ground. You need to solder the the red and green wires from the main board to the input posts on the aux. input then solder the output wires of the aux. input to the wires going into the amp board.
Once that is done you need to drill a small hole for the input to mount into, I found that just above the first channel select was about the best spot. This will involve cutting the am/fm selector plate to clear the wires. After all that it is time to put the radio case back together
5
One thing you need to be careful of is to have the radio off when you plug in and unplug your ipod because for a brief instance everything will be connected and the possibility of damaging something is higher.
With all things electrical take your time and double check all conections before you solder, I learned this the hard way and burnt up a perfectly good radio. I also used an am/fm only radio because you have more room to work, but I am sure one with a cassette would work also.
Misc pictures:
I generally don't pay too much attention to half of what he does, but I got the gist of it by looking over his shoulder for a few minutes. The way he did it was wicked easy. Here is a more detailed procedure (compliments of SWIM)
http://67-72chevytrucks.com/vboard/showthread.php?t=447379&highlight=RADIO+mOD&page=2):
Hello all. This mod came about because I wanted to listen to my ipod in my truck, but I did not want to cut my dash.
I looked into the aftermarket shaft style but right now I can't justify the cost, so for about $20 I made my own.
The first thing I did was grab a stock radio from the local yard, and started to locate what wires were the tuner wires before the amp.
This part is real easy, there is a ORANGE wire and GREEN wire that go from the main board to the amp board
1
You must be registered for see images attach
What you need to do now is cut the wires in the middle so you don't need to solder directly onto the board.
Now if you look at the location of the wires on the amp board it will tell you which one is left and right
2
You must be registered for see images attach
Next you need to get a switchable female aux. input. I found one at radio shack, and it is real easy to locate because it will have 5 posts and has a clear side so you can see inside to id which is in and out for both the left and the right channels.
The reason you need a switchable input is because without something plugged in you have normal radio function, but as soon as you plug your ipod in it will disconnect the radio function and will send the new source into the amp
3
You must be registered for see images attach
So now that you have cut the wires you need to solder 5 wires onto the aux. input. 1 ground that goes to the radio body , a right channel in and out, and a left channel in and out
4
You must be registered for see images attach
Now you need to find out which is the left and right channels on the male portion that you plug in. If you look at the plug you will see 3 sections, the first at the tip is the left channel, the next one is the right channel, and the third is the ground. You need to solder the the red and green wires from the main board to the input posts on the aux. input then solder the output wires of the aux. input to the wires going into the amp board.
Once that is done you need to drill a small hole for the input to mount into, I found that just above the first channel select was about the best spot. This will involve cutting the am/fm selector plate to clear the wires. After all that it is time to put the radio case back together
5
You must be registered for see images attach
One thing you need to be careful of is to have the radio off when you plug in and unplug your ipod because for a brief instance everything will be connected and the possibility of damaging something is higher.
With all things electrical take your time and double check all conections before you solder, I learned this the hard way and burnt up a perfectly good radio. I also used an am/fm only radio because you have more room to work, but I am sure one with a cassette would work also.
Misc pictures:
You must be registered for see images attach
You must be registered for see images attach
You must be registered for see images attach
Last edited:
highdesertrange
Full Access Member
- Joined
- Dec 19, 2013
- Posts
- 1,066
- Reaction score
- 211
- Location
- kalifornia
- First Name
- mike
- Truck Year
- 1978
- Truck Model
- k30
- Engine Size
- 454
wow way cool chengny. highdesertranger
- Joined
- Sep 29, 2010
- Posts
- 17,191
- Reaction score
- 2,518
- Location
- Green Bastard Parts Unknown
- First Name
- Jay
- Truck Year
- 2001
- Truck Model
- pontiac aztek
- Engine Size
- 3.4
@crazy4offroad is looking for one if you sell it.
crazy4offroad
Equal Opportunity Destroyer
- Joined
- Jul 30, 2010
- Posts
- 8,479
- Reaction score
- 1,109
- Location
- West BY-GOD Virginia
- First Name
- Curt
- Truck Year
- 1979
- Truck Model
- K-10
- Engine Size
- 350/SM465/NP205
@chengny The writeup you posted refers to a "switchable female aux. input" at Radio Shack. I cant find one on the site anywhere.
edward61
Junior Member
- Joined
- Nov 12, 2015
- Posts
- 1
- Reaction score
- 0
- Location
- Dallas , Tx
- First Name
- Edward
- Truck Year
- 1986
- Truck Model
- 1500
- Engine Size
- 5.7
@chengny The writeup you posted refers to a "switchable female aux. input" at Radio Shack. I cant find one on the site anywhere.
I ordered one on ebay its about $5.00
Similar threads
- Replies
- 12
- Views
- 976
- Replies
- 3
- Views
- 234


