Quadrajet Primary Shaft Bushings

Disclaimer: Links on this page pointing to Amazon, eBay and other sites may include affiliate code. If you click them and make a purchase, we may earn a small commission.

hey mister

Full Access Member
Joined
Jun 15, 2024
Posts
270
Reaction score
640
Location
North Coast
First Name
Marty
Truck Year
1978
Truck Model
C10
Engine Size
350
Why never?
Is that because of sticky goo and hard varnish residue?
Ive seen a WD40 dried varnish when wd40 dries on guns
WD40 is a fish oil based product. Over time it decays and stinks like tuna boat.
If ya doubt me, spray a few of your wrenches with it and close it up in a toolbox. Come back in the spring and be ready to gag.
There are plenty of other penetrating options out there.
In fact, I would use 50/50 of ATF and Acetone as a good penetrating solution. I've seen cast iron piston rings in steam engines broke loose using that 50/50.
Good stuff.
 

hey mister

Full Access Member
Joined
Jun 15, 2024
Posts
270
Reaction score
640
Location
North Coast
First Name
Marty
Truck Year
1978
Truck Model
C10
Engine Size
350
I didnt think you can even get that stuff anymore. I live in the boonies and cant get stuff like that anyway
I heard years ago it is all environmentally safe and weak and doesnt work very good. And the price is outrages
Bought a gallon yesterday.
You can order it from Summit...I think.
It was $40. @ Oreilys.
 

JD Miller

Full Access Member
Joined
Sep 30, 2024
Posts
358
Reaction score
654
Location
Goober Idaho
First Name
JD
Truck Year
1981
Truck Model
K20 silverado
Engine Size
350
I dont doubt you on the "dont use spray lube".
Just wondered why.
I dont use it anyway. WD40 turns to a varnish

I have acetone, and Id rather buy another gallon of acetone and use that, than enviro friendly weak carb cleaner gallon

Well this thread is getting me motivated to finish final cleaning and finish rebuilding my q-jet, that got put on the back burner. I do several cleaning sessions cause its never clean enough for me, "Too Picky" :cool:
:waytogo:
 
Last edited:

vr1967

Full Access Member
Joined
Apr 16, 2023
Posts
248
Reaction score
869
Location
Mississippi
First Name
Virgil
Truck Year
1984
Truck Model
k1500
Engine Size
6.2L turbo
If they leak, I can machine new plugs and use a polyester epoxy to seal.
That’s a lot of work to machine plugs when, once removed, we tapped the primary ones for 10-32 plugs and Marine Tex, or Devcon epoxy the threads.

Even Cliff has suggested that over the years.

Guess I’m a dinosaur though, as I was doing that in the 80s and early 90s.
 

JD Miller

Full Access Member
Joined
Sep 30, 2024
Posts
358
Reaction score
654
Location
Goober Idaho
First Name
JD
Truck Year
1981
Truck Model
K20 silverado
Engine Size
350
Was reading HAMB about carb soak cleaners. Few people use Awesome, said it works great... I Had a little spray bottle of the stuff and tried a little spray with a tooth brush scrub on my top plate black carbon. Wow! that stuff works great. Rinsed with hot water and blew dry .
Im going to to the $.99cent store in the next town down river and pick up a gallon or two and do a bucket soak
You must be registered for see images attach
 

hey mister

Full Access Member
Joined
Jun 15, 2024
Posts
270
Reaction score
640
Location
North Coast
First Name
Marty
Truck Year
1978
Truck Model
C10
Engine Size
350
That’s a lot of work to machine plugs when, once removed, we tapped the primary ones for 10-32 plugs and Marine Tex, or Devcon epoxy the threads.

Even Cliff has suggested that over the years.

Guess I’m a dinosaur though, as I was doing that in the 80s and early 90s.
I guess it's all in your perspective.
Something like that, I don't consider work. It's a fun little project to fix something.
 

hey mister

Full Access Member
Joined
Jun 15, 2024
Posts
270
Reaction score
640
Location
North Coast
First Name
Marty
Truck Year
1978
Truck Model
C10
Engine Size
350
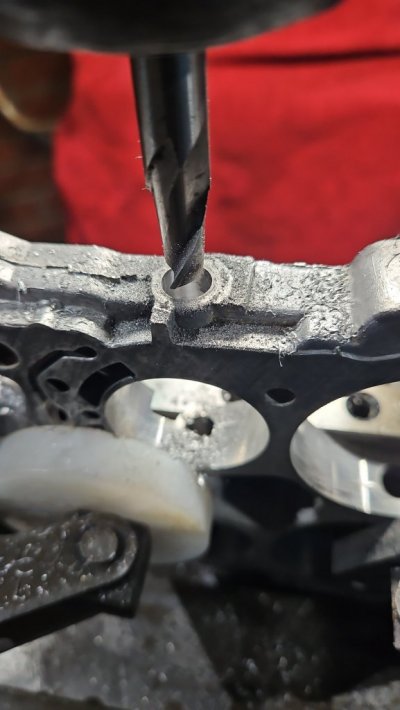
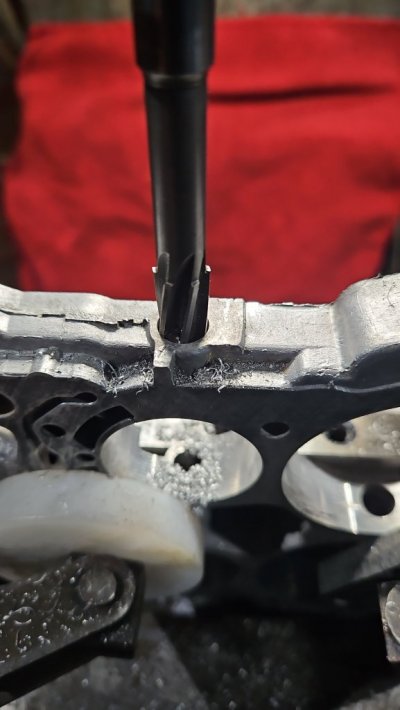
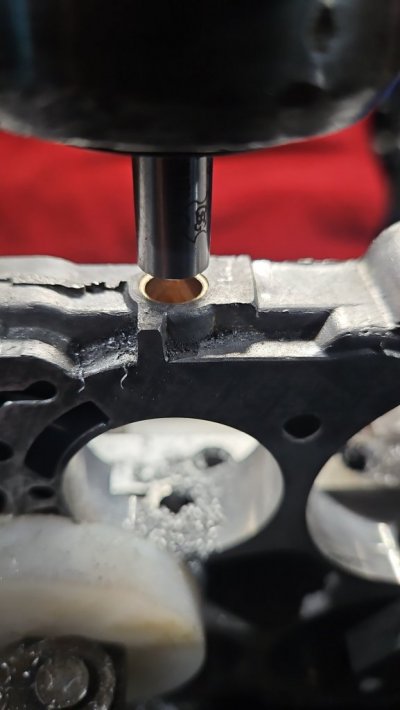
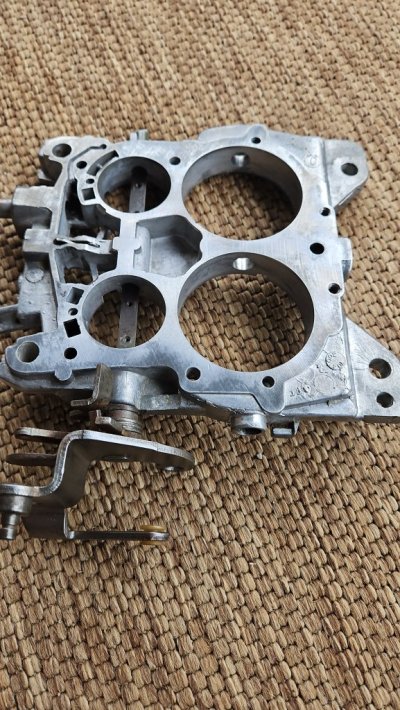
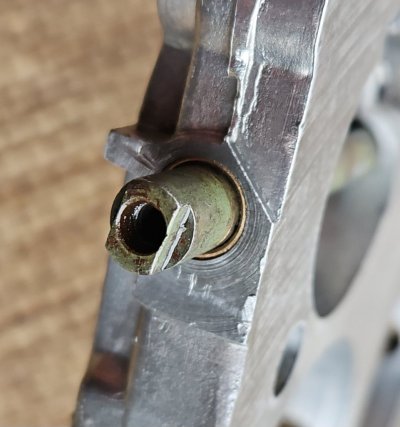
This is the setup on the mill to bore and ream for the bushing.
Prior to machining, I checked the bore and shaft with gauges and a mic.
The shaft is 0.311.
The bores checked 0.318.
A nice slip fit for a rotating shaft is 0.0015-0.002.
And at 0.002 end, you start to feel play in the fit.
My shaft and bore had a "stand back and toss the shaft in" clearance. (.007)
Had I installed a carb rebuild kit and bolted the carb on, it would have never run right. And just to be clear, you can easily see daylight through a .003 gap.
If light is getting through, so is air.
 

Attachments

  • IMG_20241210_112304_586.jpg
    IMG_20241210_112304_586.jpg
    77.8 KB · Views: 18
  • IMG_20241210_112455_063.jpg
    IMG_20241210_112455_063.jpg
    74.9 KB · Views: 17
  • IMG_20241210_112731_231.jpg
    IMG_20241210_112731_231.jpg
    62.1 KB · Views: 18
  • IMG_20241210_121505_355.jpg
    IMG_20241210_121505_355.jpg
    217.9 KB · Views: 17
  • IMG_20241210_121538_185.jpg
    IMG_20241210_121538_185.jpg
    116.8 KB · Views: 14

YakkoWarner

Full Access Member
Joined
May 29, 2024
Posts
188
Reaction score
252
Location
Central Texas
First Name
Wolf
Truck Year
1989
Truck Model
R2500 Suburban
Engine Size
454
This is the setup on the mill to bore and ream for the bushing.
Prior to machining, I checked the bore and shaft with gauges and a mic.
The shaft is 0.311.
The bores checked 0.318.
A nice slip fit for a rotating shaft is 0.0015-0.002.
And at 0.002 end, you start to feel play in the fit.
My shaft and bore had a "stand back and toss the shaft in" clearance. (.007)
Had I installed a carb rebuild kit and bolted the carb on, it would have never run right. And just to be clear, you can easily see daylight through a .003 gap.
If light is getting through, so is air.

I think I need to get this process done on my TBI throttle body - there is definite play on the butterfly shaft. This is also a common problem on the 50 year old SU side-drafters found on British cars (which I also need to get done).
 

hey mister

Full Access Member
Joined
Jun 15, 2024
Posts
270
Reaction score
640
Location
North Coast
First Name
Marty
Truck Year
1978
Truck Model
C10
Engine Size
350
I think I need to get this process done on my TBI throttle body - there is definite play on the butterfly shaft. This is also a common problem on the 50 year old SU side-drafters found on British cars (which I also need to get done).
Motorcycle carbs were prone to this as well.
In fact the Goldwings had this issue. But if you were a tad ingenous, soft washers could be sandwiched between the throttle body and linkage, on the butterfly shaft. It was a bandaid for a terminal problem.
The main issue is anytime you have a steel rotating shaft in an aluminum housing, in a dirty enviroment, wear is going to happen.
Bushings are the fix, if ya got the room to put em in.
 
Last edited:

hey mister

Full Access Member
Joined
Jun 15, 2024
Posts
270
Reaction score
640
Location
North Coast
First Name
Marty
Truck Year
1978
Truck Model
C10
Engine Size
350
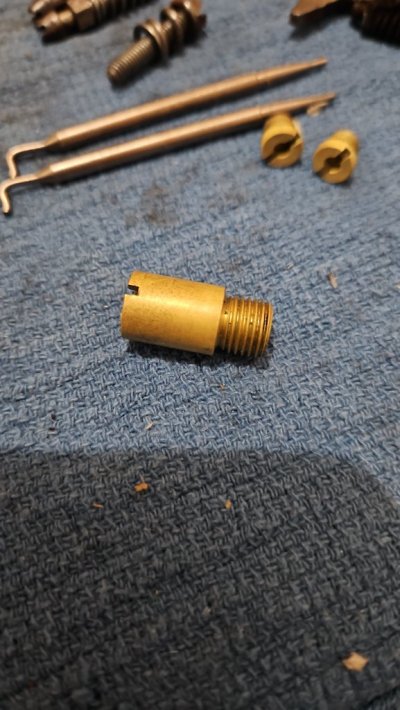
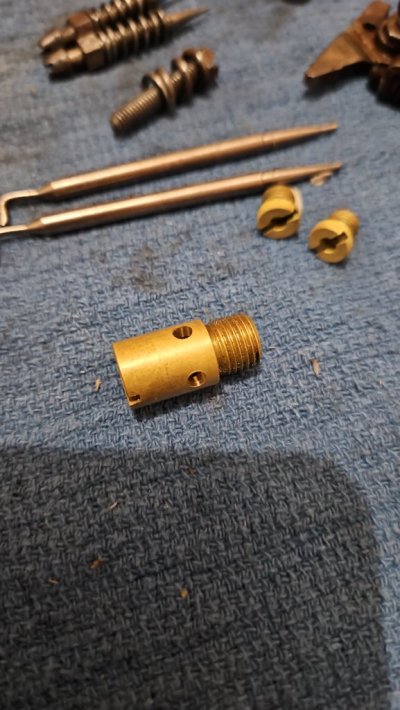
So here is one mod I like and I got the idea from a rebuild kit I had seen.
The float seat had been slotted to assist in fuel flow.
So I cross drill mine, unless the rebuild kit comes with a modified seat.
 

Attachments

  • IMG_20241210_155912_235.jpg
    IMG_20241210_155912_235.jpg
    123.1 KB · Views: 10
  • IMG_20241210_195153_914.jpg
    IMG_20241210_195153_914.jpg
    121.7 KB · Views: 9

YakkoWarner

Full Access Member
Joined
May 29, 2024
Posts
188
Reaction score
252
Location
Central Texas
First Name
Wolf
Truck Year
1989
Truck Model
R2500 Suburban
Engine Size
454
Motorcycle carbs were prone to this as well.
In fact the Goldwings had this issue. But if you were a tad ingenous, soft washers could be sandwiched between the throttle body and linkage, on the butterfly shaft. It was a bandaid for a terminal problem.
The main issue is anytime you have a steel rotating shaft in an aluminum housing, in a dirty enviroment, wear is going to happen.
Bushings are the fix, if ya got the room to put em in.

I saw a video of an ingenious guy from somewhere in the Middle East who found valve stem seals that could be used as a stopgap on the SU side drafters.

I want to do bushing in both my Suburban's TBI and the British SUs, but I don't want to risk destroying my only existing ones in the attempt, so the plan is to buy other worn out ones and attempt to rebuild them, and if successful swap over. Downside to that plan is that the bushing kits are expensive and unfortunately a milling machine is way out of my budget.
 

hey mister

Full Access Member
Joined
Jun 15, 2024
Posts
270
Reaction score
640
Location
North Coast
First Name
Marty
Truck Year
1978
Truck Model
C10
Engine Size
350
I saw a video of an ingenious guy from somewhere in the Middle East who found valve stem seals that could be used as a stopgap on the SU side drafters.

I want to do bushing in both my Suburban's TBI and the British SUs, but I don't want to risk destroying my only existing ones in the attempt, so the plan is to buy other worn out ones and attempt to rebuild them, and if successful swap over. Downside to that plan is that the bushing kits are expensive and unfortunately a milling machine is way out of my budget.
Oh that is brilliant. I would of never thought of valve stem seals..brilliant.

I am offering a service to do the bushings @ $50.+ s/h.
Search my other posts.
 

hey mister

Full Access Member
Joined
Jun 15, 2024
Posts
270
Reaction score
640
Location
North Coast
First Name
Marty
Truck Year
1978
Truck Model
C10
Engine Size
350
I saw a video of an ingenious guy from somewhere in the Middle East who found valve stem seals that could be used as a stopgap on the SU side drafters.

I want to do bushing in both my Suburban's TBI and the British SUs, but I don't want to risk destroying my only existing ones in the attempt, so the plan is to buy other worn out ones and attempt to rebuild them, and if successful swap over. Downside to that plan is that the bushing kits are expensive and unfortunately a milling machine is way out of my budget.
From what I can tell from pictures, there seem to be enuf meat to install bushings on the SU's.
The real issue would be, are there bushings availavle from a bearing waerhouse.
I did see a SzU carb on fleabay for $45.
 

JD Miller

Full Access Member
Joined
Sep 30, 2024
Posts
358
Reaction score
654
Location
Goober Idaho
First Name
JD
Truck Year
1981
Truck Model
K20 silverado
Engine Size
350
This is the setup on the mill to bore and ream for the bushing.
Prior to machining, I checked the bore and shaft with gauges and a mic.
The shaft is 0.311.
The bores checked 0.318.
A nice slip fit for a rotating shaft is 0.0015-0.002.
And at 0.002 end, you start to feel play in the fit.
My shaft and bore had a "stand back and toss the shaft in" clearance. (.007)
Had I installed a carb rebuild kit and bolted the carb on, it would have never run right. And just to be clear, you can easily see daylight through a .003 gap.
If light is getting through, so is air.
.007 clearance? OK so what happened ? Why was there so much clearance with the new bushings and shaft? Was the shaft worn junk? How did you fix that? New shaft available :think:

Every seen that video of, Jeff Bradshaw of Elderly Iron, rapping and tying thread around a Carburetor shaft to fix loose shaft vacuum leak?:eek::eek:
 
Last edited:

legopnuematic

Licensed Junk Dealer
Supporting Member
Joined
Oct 27, 2016
Posts
2,613
Reaction score
6,886
Location
MO
First Name
Spencer
Truck Year
1971, 1̶9̶7̶4, 1976, 1979,1̶9̶8̶5, 2002
Truck Model
Dart Swinger, Sierra 10, C10 Cheyenne, C10 Big Ten, Silverado 10, Ram 2500
Engine Size
225/6, 350 c.i., 350 c.i., 5.9l Cummins
@JD Miller if I’m reading it right, the .007 clearance was pre machining/bushing install.
 

Forum statistics

Threads
44,414
Posts
957,078
Members
36,750
Latest member
jdishman2355
Top